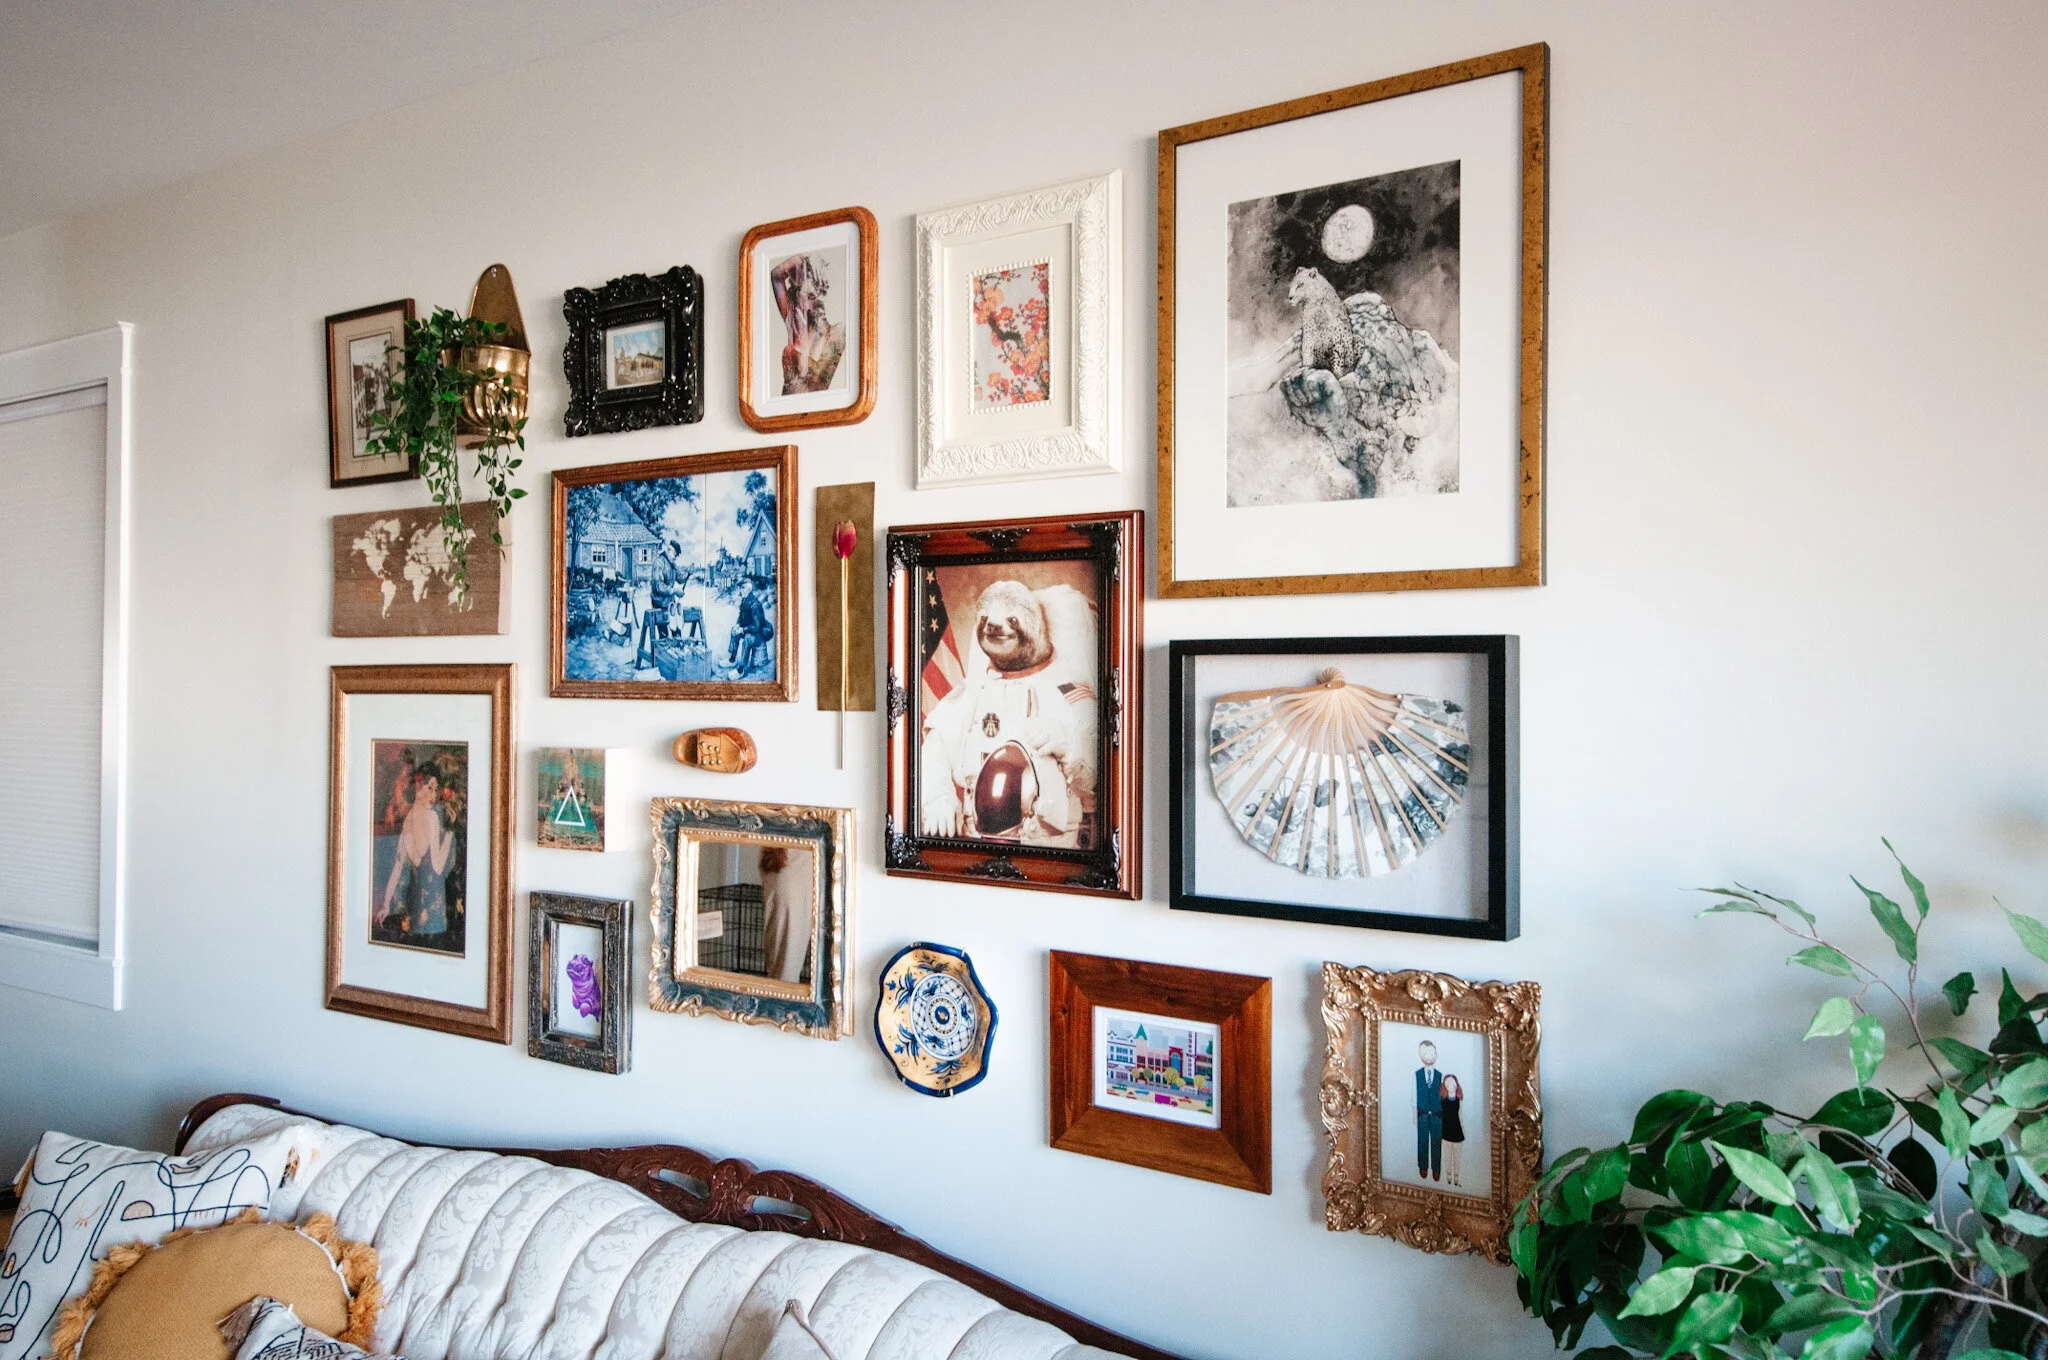
Eclectic Gallery Wall
I recently had the pleasure of creating this very fun gallery wall with one of my clients here in Edmonton. Most of our gallery wall work is done virtually through our Gallery Wall E-Design service so it was particularly satisfying to complete this one in person – including some shopping time!
Gallery Wall Prep
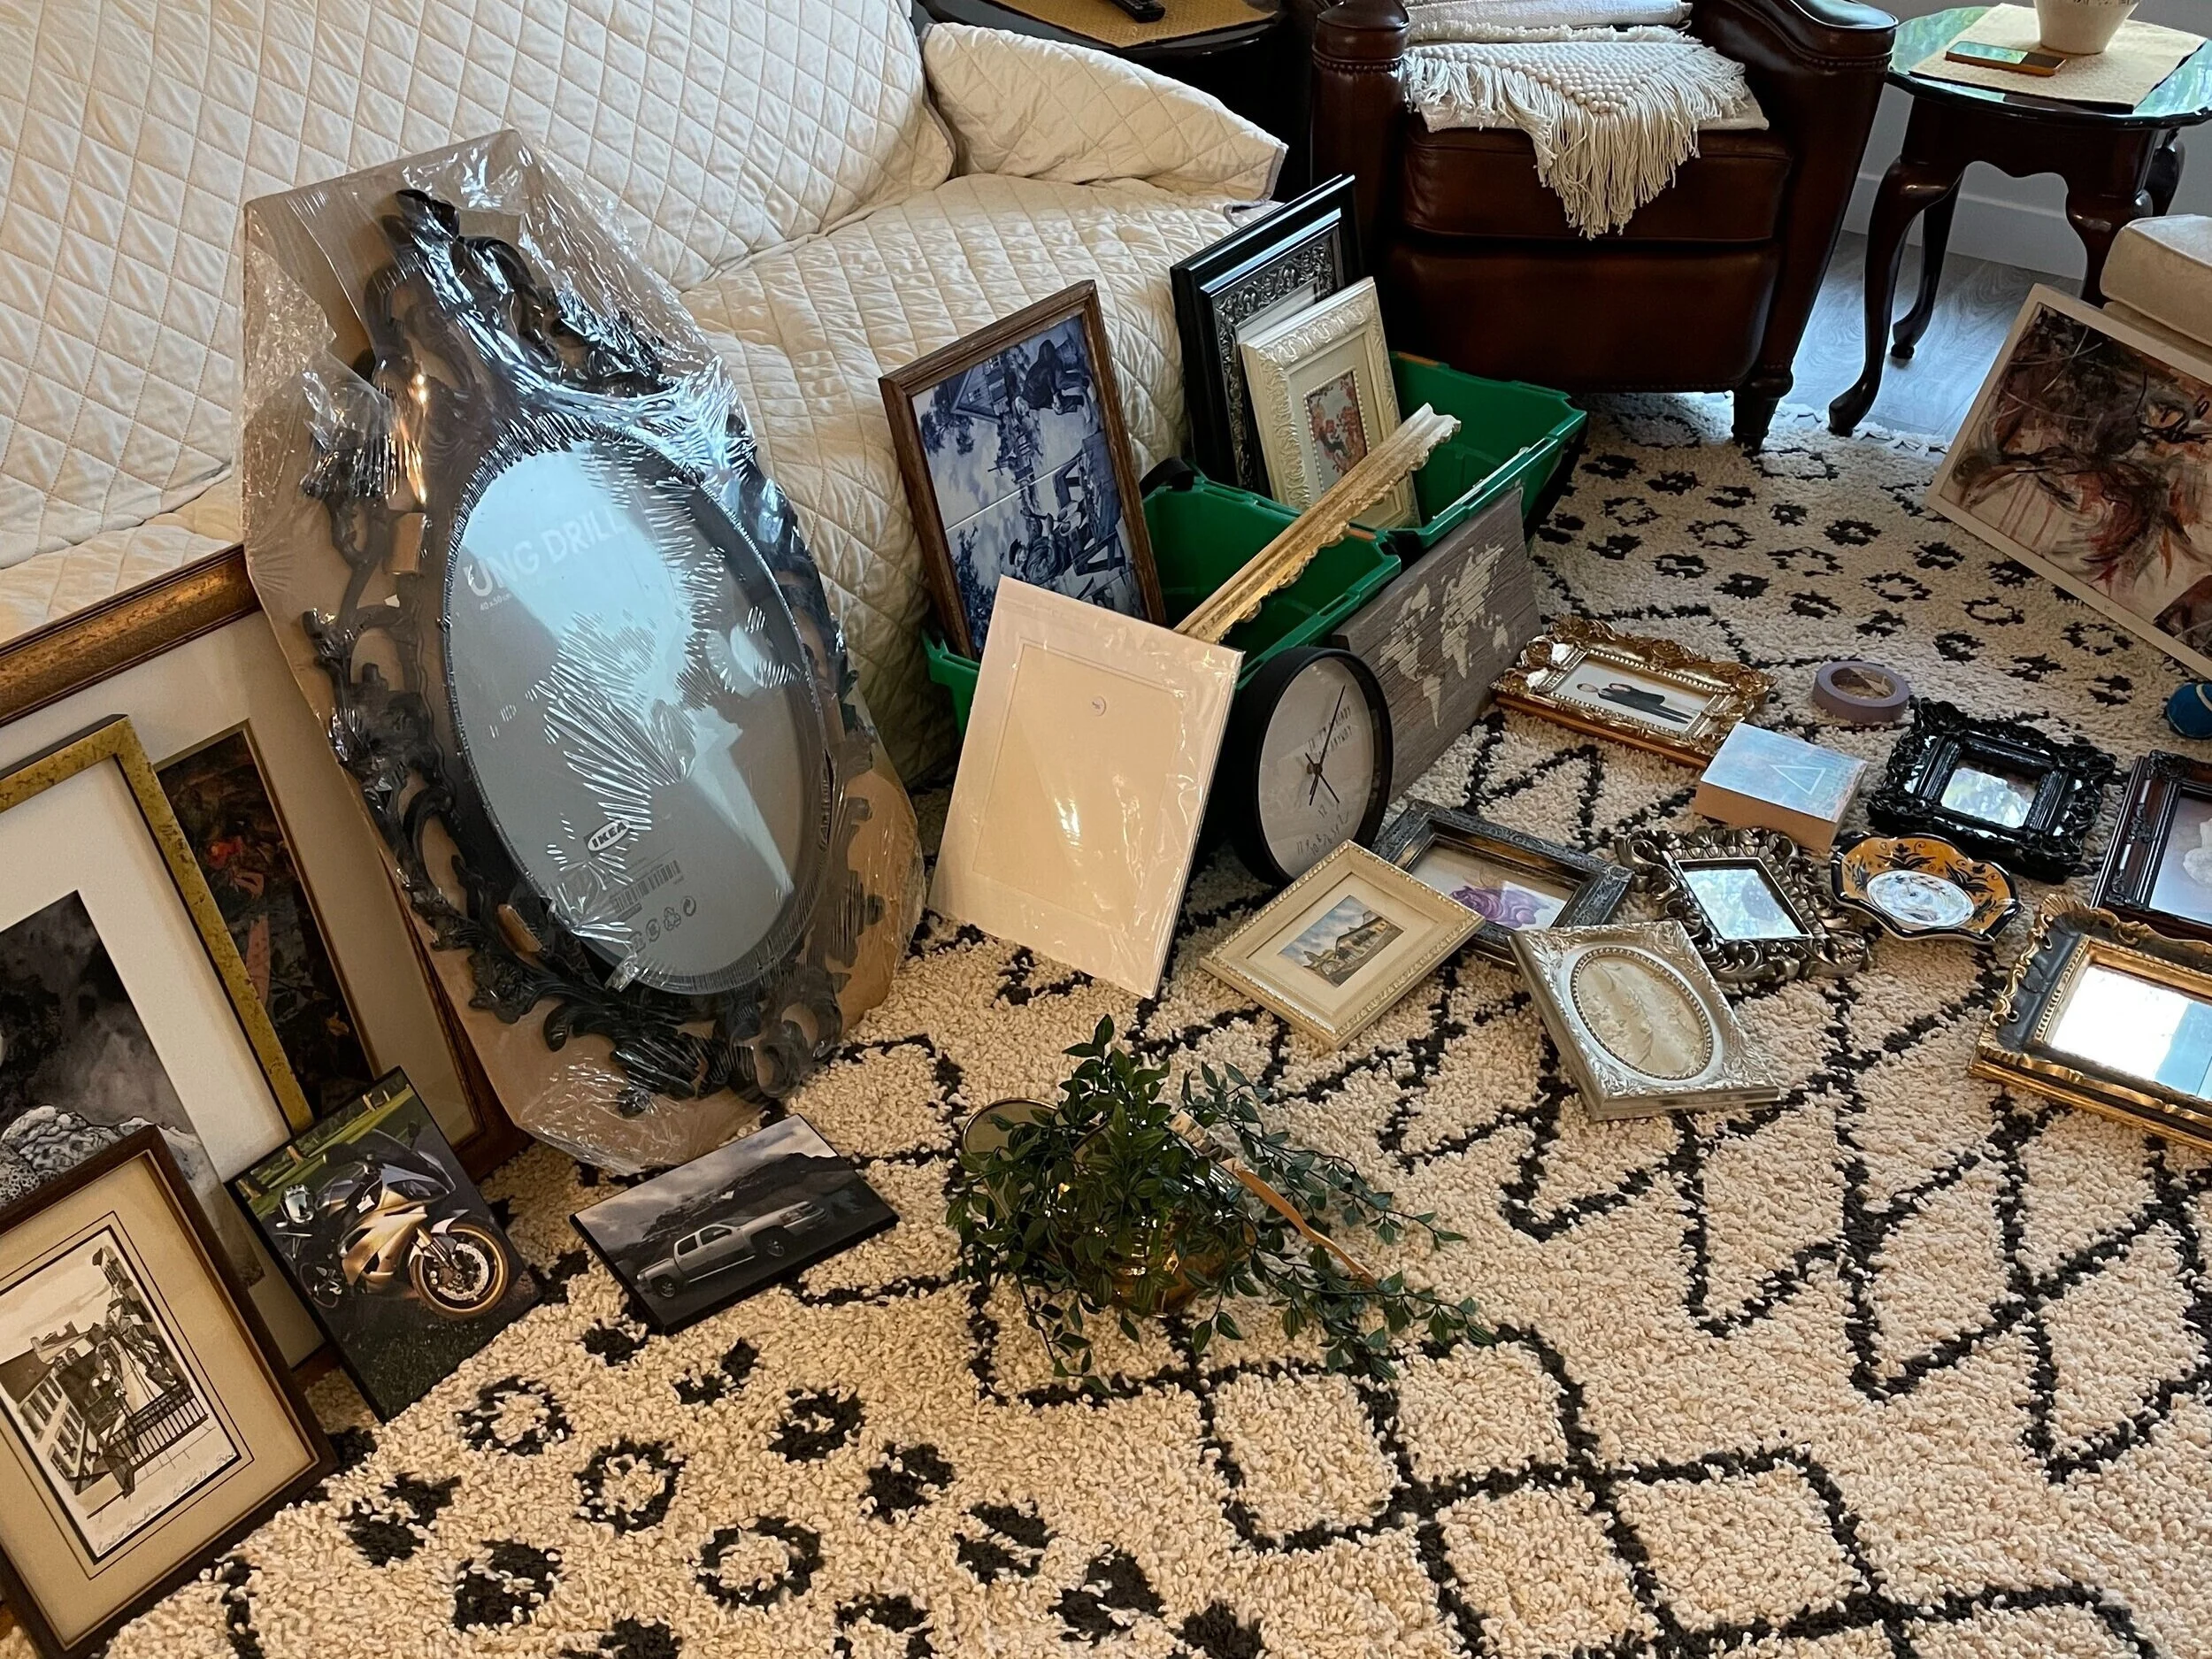
Prior to our in-person meeting, I had my client pull out every item that could be a possibility for the wall. We then went through the items and prioritized what were the must have items and what were in the maybe category. Some of those must have items included ones that needed to be modified in some way, either needing a mat for a larger frame or a new frame altogether.
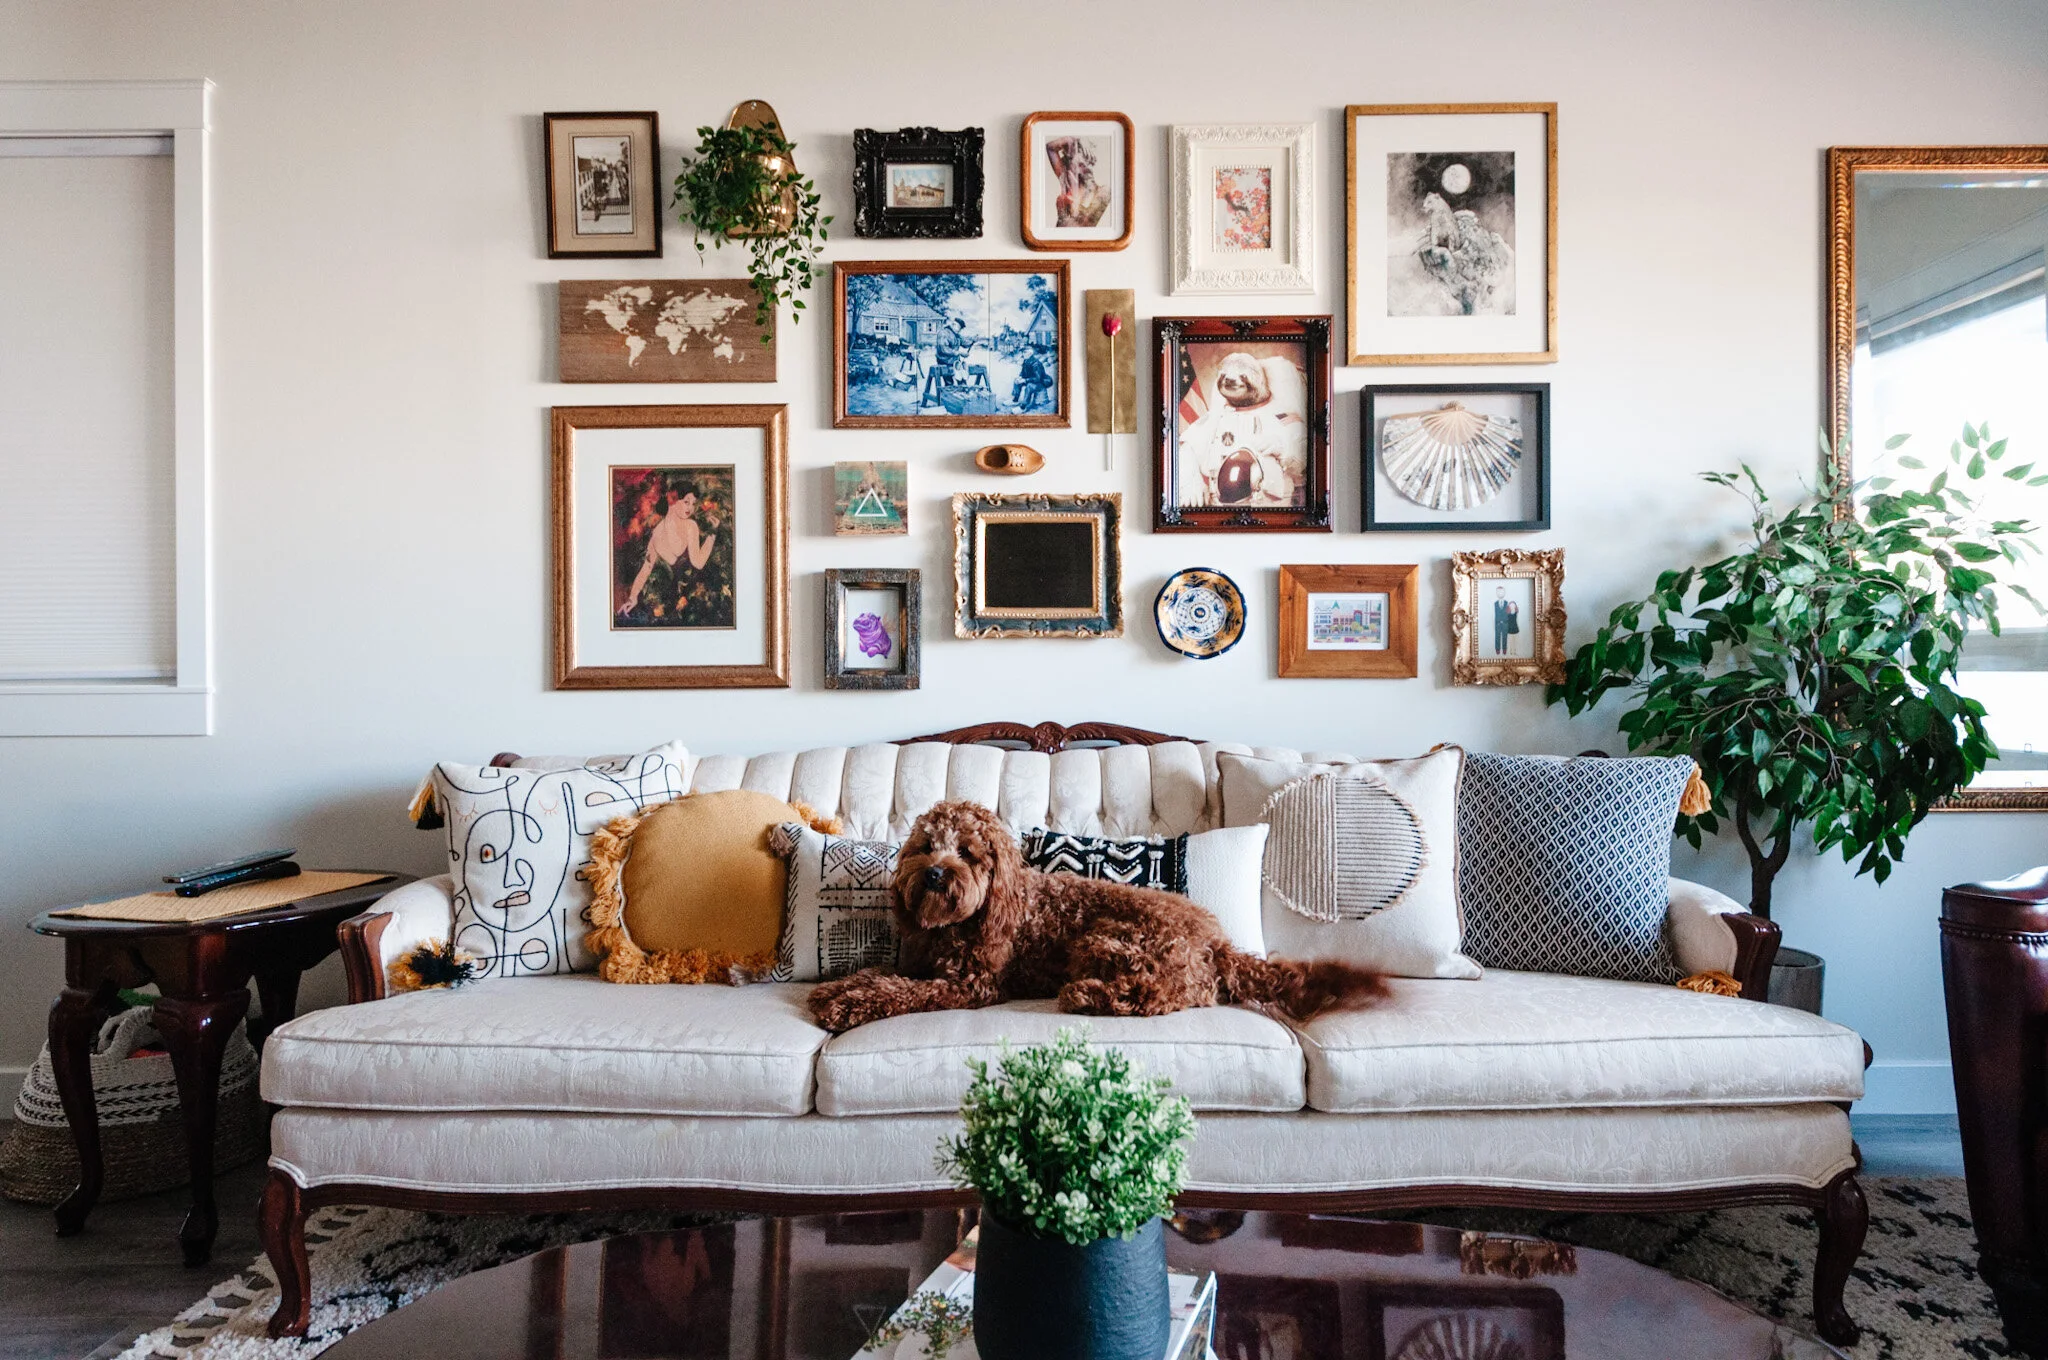
The next step was to determine the boundaries we had to work with. Out came the measuring tape and, based on the size of the existing sofa, we decided on a gallery size that was just a little smaller (so that the sofa would anchor the space) with a few inches between the highest part of the sofa and the lower boundary of the gallery. We then mocked up those same boundaries on the area rug using a couple of curtain rods. As you may remember from my post on How to Create a Gallery Wall, I tend to go with either a Contained or a Free Form gallery wall. In this case, because my client had so many items she wanted to showcase, I felt the Contained was best suited to the requirements.
Gallery Wall Design
When I’m building the gallery wall in person, it’s pretty easy for me to put it together with a bit of trial and error in a short period of time. This is often where clients get stuck, especially when the gallery wall comprises a mix of items and sizes, because there are so many variables to keep balanced. Having a professional help you means you get to skip all the frustration of not understanding why it isn’t “feeling right” and just hand it over to someone else to organize based on your specifications.
I also loved that her items ranged from heirlooms to cheeky prints. It is such a great representation of who she is! And I can’t get enough of when frames are paired with other objects, and in this case a faux plant too!
Gallery Wall Additions
We had a few spots where a piece just needed a different frame or required a new mat. And we had a couple spots that we needed to fill with something unique. In preparation for our shopping trip, I took photos of those spots or those items, and made notes on the photos so we’d have something to reference in our search.


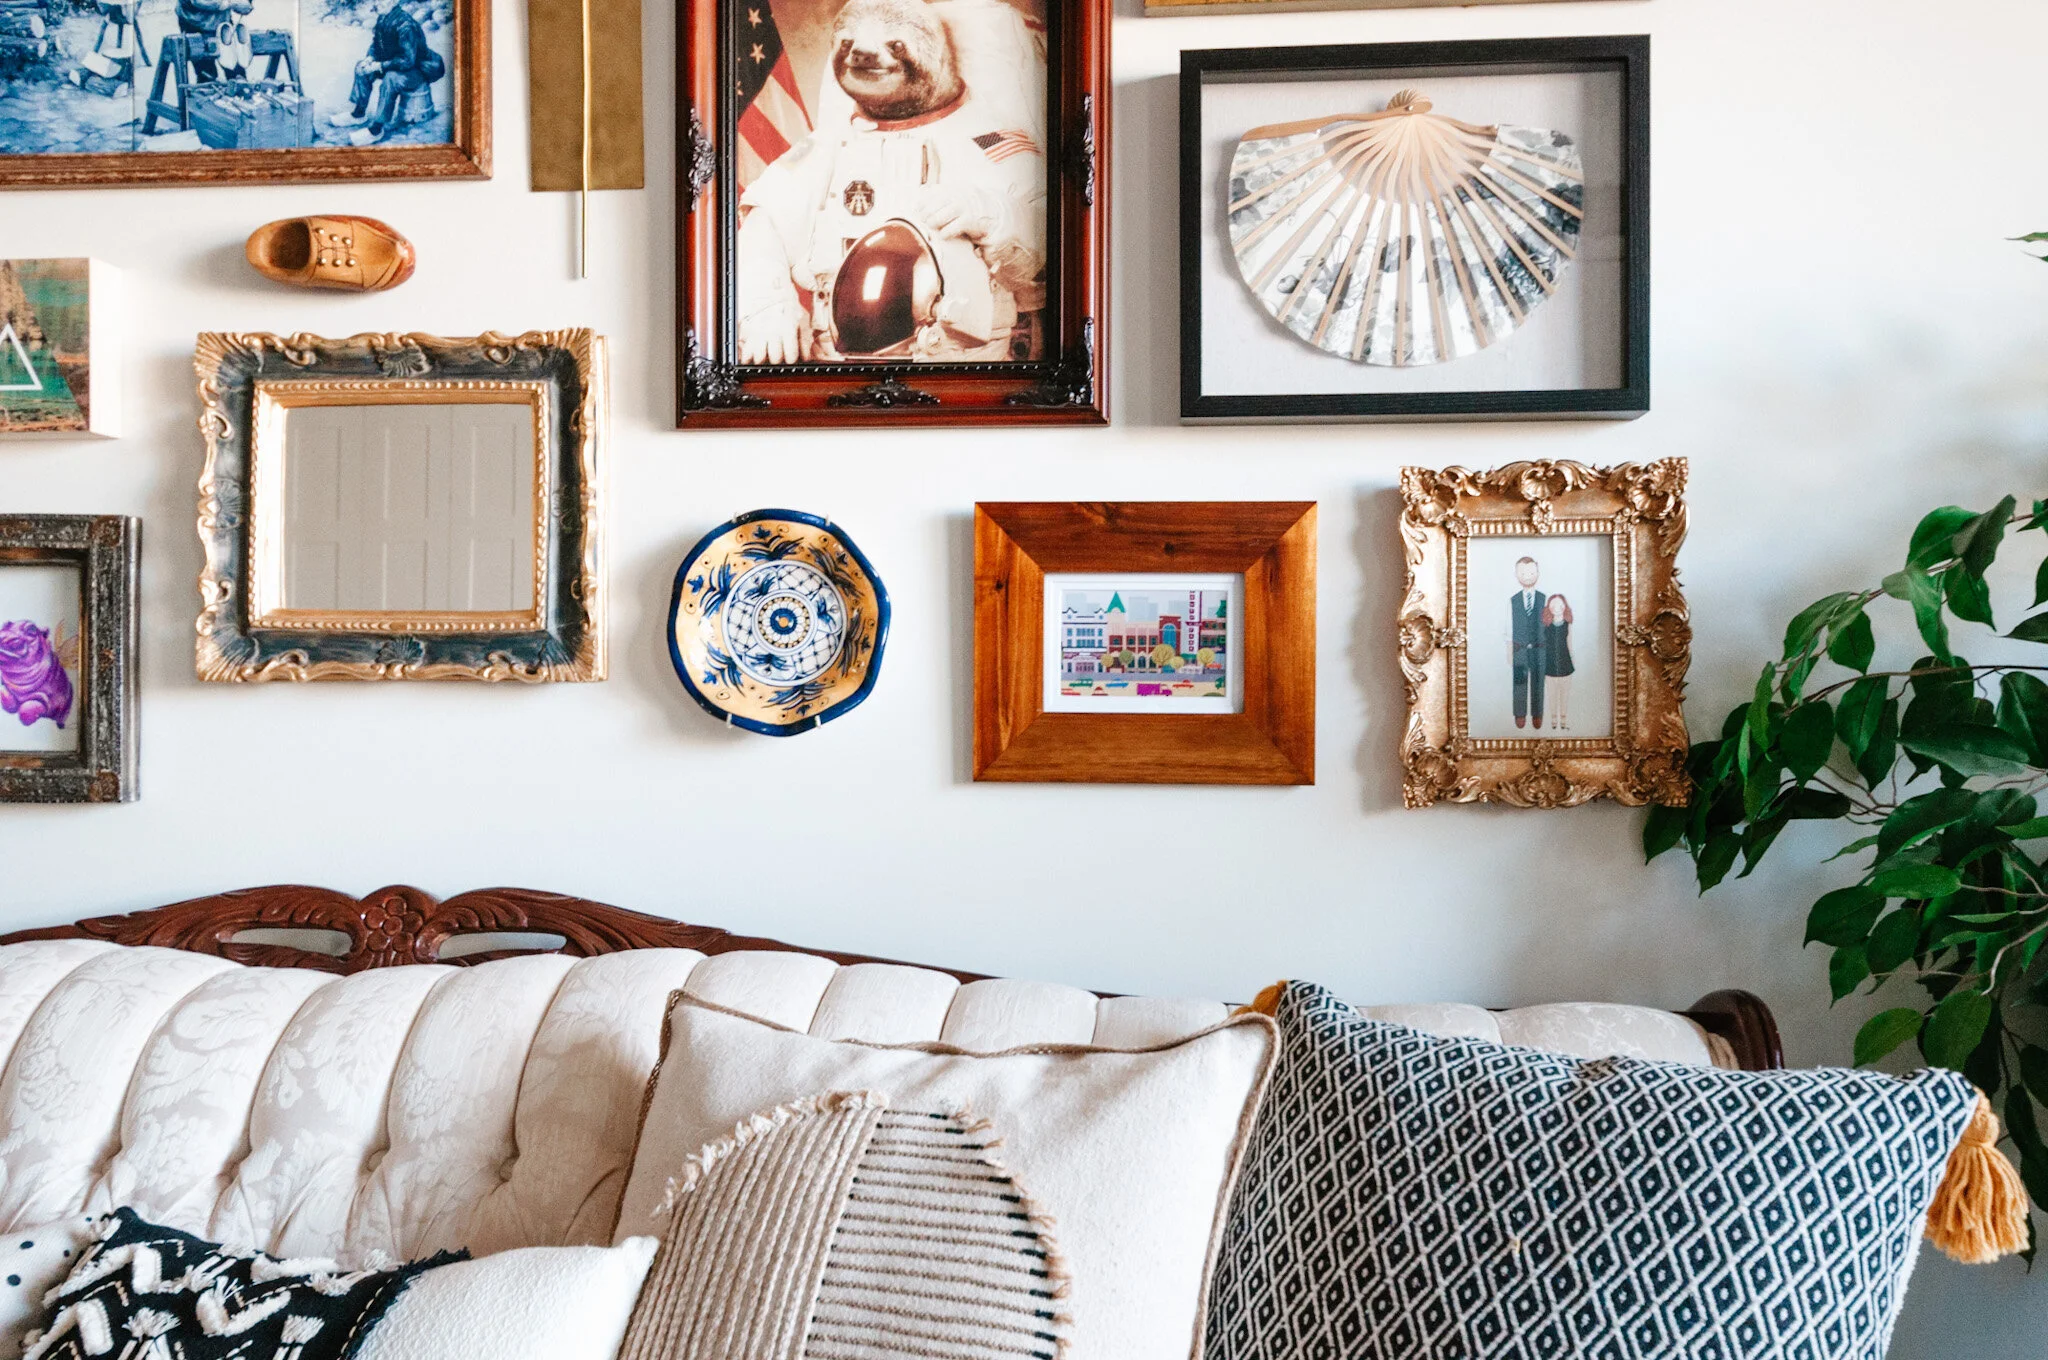
We were able to pick up one of the new frames at Home Sense, grabbed pre-cut mats at Michaels (as well as the shadow box frame for the fan) and then went thrifting for the additional pieces and one unique frame.
Gallery Wall Installation
My client’s partner happens to be very handy, so he was ready for installation when we returned from shopping. Once we had the new items in place and a couple of items re-framed, we chose one corner as the starting point and away we went.
Pro-tip: take a photo of the final layout before you start so you have a visual reference for where everything goes as you start installing. Once a few pieces are on the wall it can sometimes be tricker to remember how everything was meant to be arranged.
Since I was already there, I also helped place the larger mirror and make some small adjustments to furniture placement. I love how it turned out and my client does too!

If you’re in the Edmonton area and want hands-on help similar to this project, please reach out for a customized quote. And if you want to go with the E-Design option, it is always available for purchase in the shop!