4 Tips for Getting Started with Investment Properties
Let me first start by introducing myself, I am a 2023 Lakeland College graduate in Interior Design Technologies. In 2020 while COVID was making it’s impact I really started to think about my future. I had been working as a court clerk for almost four years and while I enjoyed that career I knew it was time for a change. I have always had an interest in creativity and things that are a bit more crafty so when I started to look into going back to school, interior design seemed like the perfect fit! I absolutely loved school and all the new things I learned!
The last course of my program was to complete an 8 week practicum. I have been extremely fortunate to complete my practicum hours with Kierstin Smyth Design! Kierstin and Heather have really shown me the ropes and made me feel so welcome to join their team for this quick 8 week practicum! The education I have received on the job has been everything I could hope for and more. Before I jump into the topic of investment properties, I would like to thank Kierstin and Heather for taking the time to coach and teach me over the last eight weeks, it has been an incredibly worthwhile experience.

My interest in investment properties is one of the biggest reasons as to why I decided to study interior design. In June 2022 my partner and I bought a new (to us) investment property that we had intended to do a full flip on and then rent out. Spoiler it is June 2023 and we are just now completing the project! We have been working on the house for a while and with me being in school full time and him working Monday to Friday it has been difficult to get the work done in our limited free time. This is just our second rental property and as you can probably imagine there has been quite the learning curve! Below I have curated a few tips that I have learned along the way that may help you get started. On our next project I have some ideas on how to save ourselves some grief and I am excited to share them with you.

Here are my four tips on getting started in investment properties.
Be prepared for your budget to change.
When we bought this house we knew that there was going to be a lot of time and money needed to get it to the standard we wanted in order for it to be ready for tenants. The foundation needed a big repair, the walls are concrete block and when a new sidewalk was poured leading up to the side of the house about 5 years ago some of the blocks started to push out. The rest of the house was mostly aesthetic fixes; new paint, new trim, new kitchen cabinets, etc… or so we thought. We started to remove all the baseboards and unfortunately in an upstairs bedroom we discovered some wood rot. After pulling some drywall off it was much worse than we had anticipated, the wood was rotten from the attic down to the basement. This was an unexpected cost that just could not be avoided. The studs needed to be reinforced/replaced, we needed new insulation and drywall, and the leak had to be found and fixed. At the end of the day you really don’t know what may be hiding behind your walls (or in your walls), a home inspection can help with this but there are times that an inspector just cannot see everything hidden. My suggestion will always be to be prepared for unexpected costs, if you don’t have a super flexible budget you should also be prepared to have to adjust your design plans.
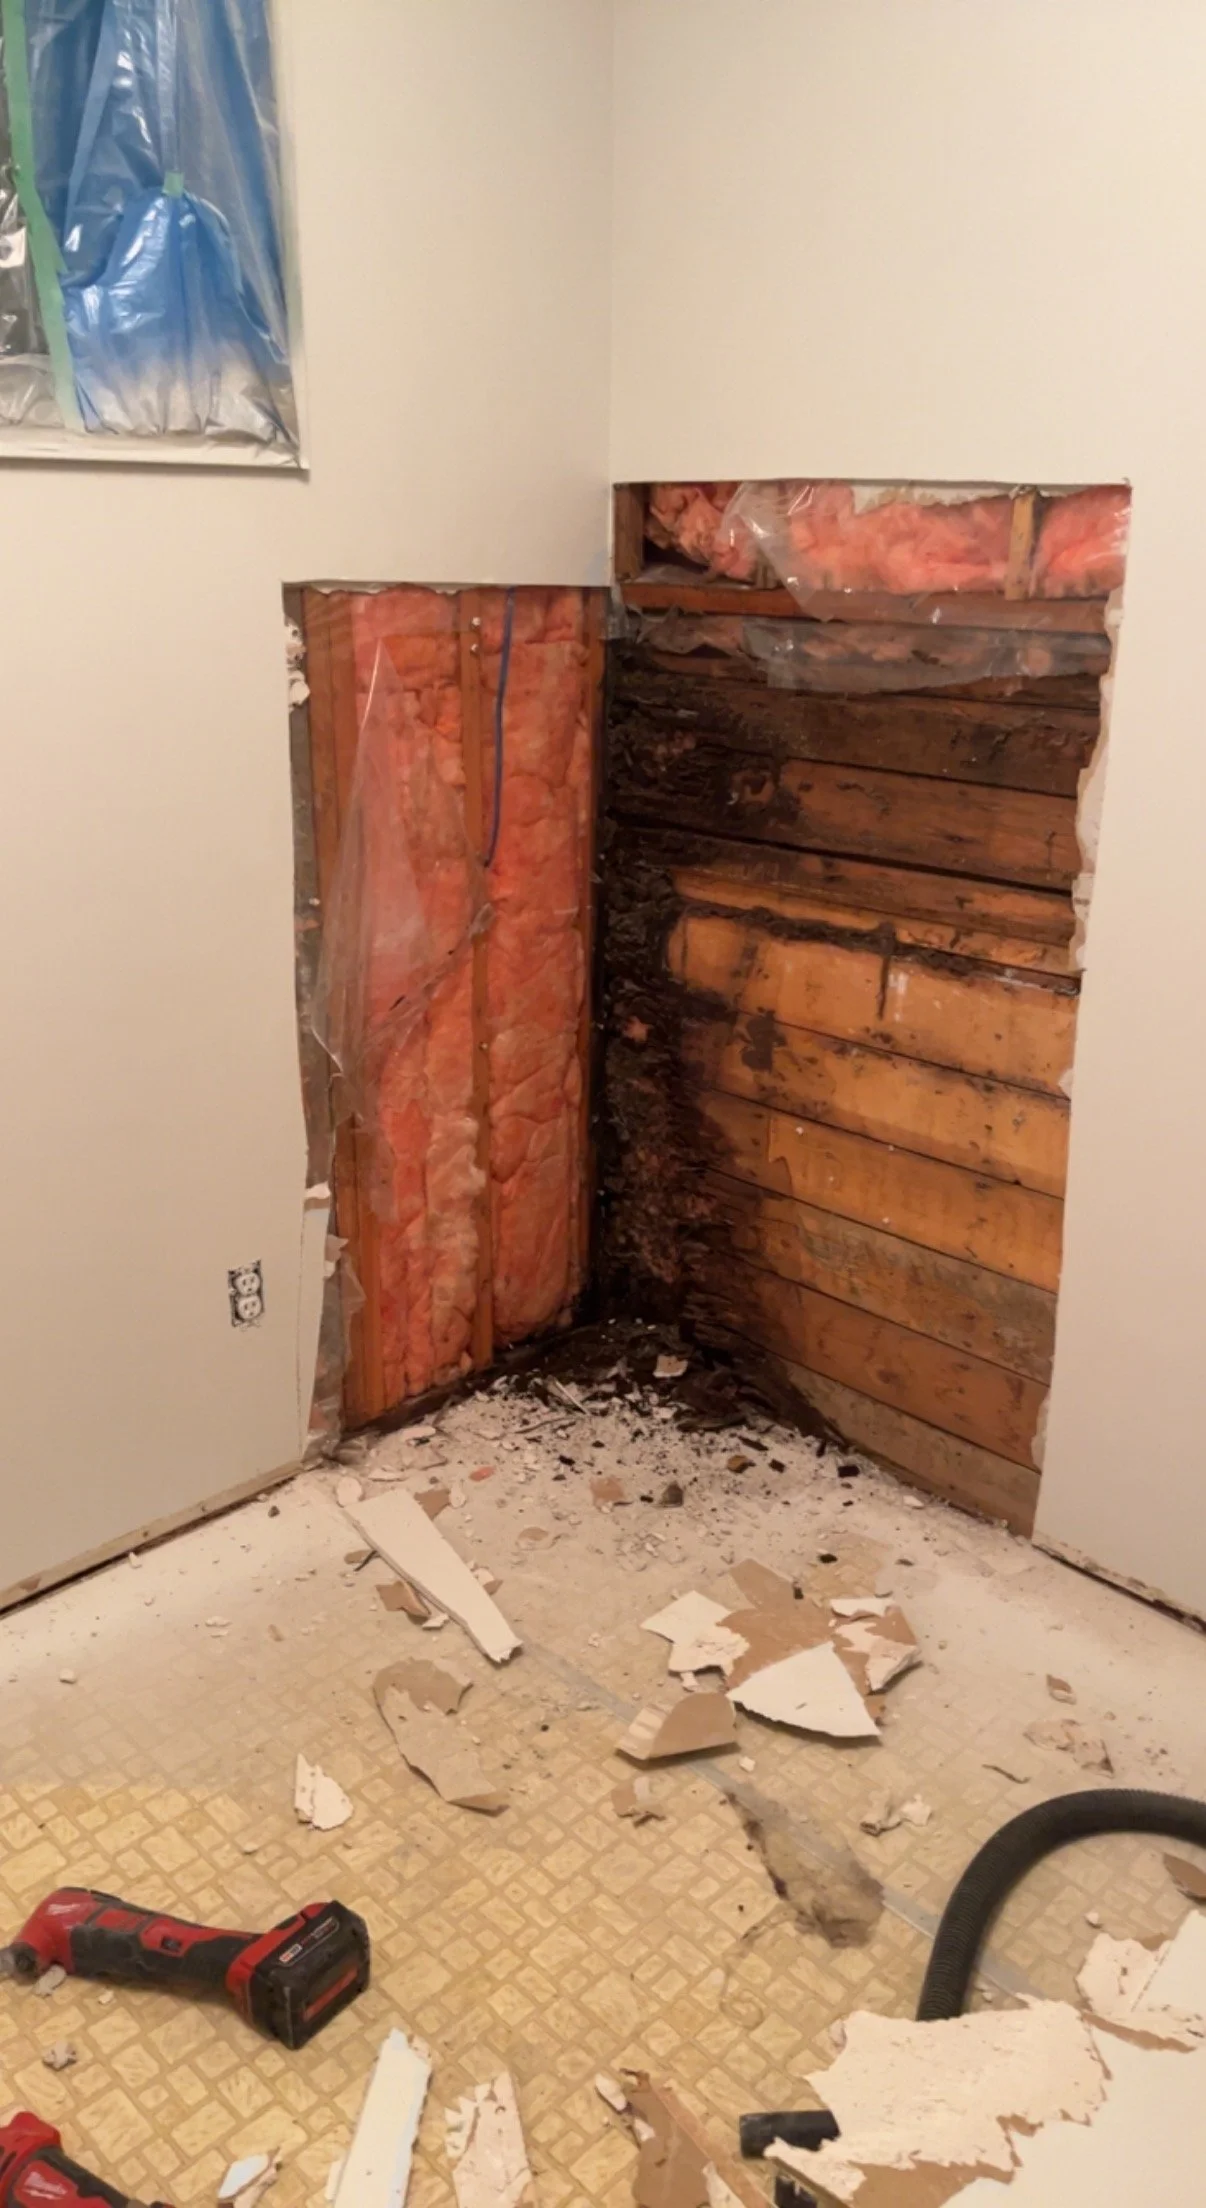
We took the drywall off and discovered a ton of wood rot, so we gutted that section of wood and had the studs and drywall replaced.
It will probably take longer than you think.
When we first started the renovation we may have been a bit naive as to how long it would actually take. We thought we would have this house rented out by March, it’s June now and we are hoping for July 1st! This is our second investment property so we are not pros by any means, and we did most of the work ourselves so naturally it took some time. If you plan on doing most of the work yourself instead of hiring trades give yourself some grace, it takes time to finesse your skills. Practice makes progress! Something I wish we would have been better at was making a schedule, we had a general plan but it probably would have gone a bit smoother had we mapped out a proper schedule with dates to have certain tasks completed.
DIY as much as you can.
There are of course some things that are not doable on your own. However, most people know how to use a nail and a hammer! One of my favourite parts of this house is the new kitchen, we used IKEA cabinetry to save on the cost, it meant a lot more hands-on time but it saved us a ton of money! We also learned how to lay and set tile and tiled throughout the kitchen and mudroom. Tiling took a lot of time and my knees were sore when it was done but, there is such a great feeling of satisfaction looking at the new tile floor and knowing we did it ourselves! There are so many resources available to us now with the internet, if you want to learn something new chances are countless people have shared their expertise on the internet for it.

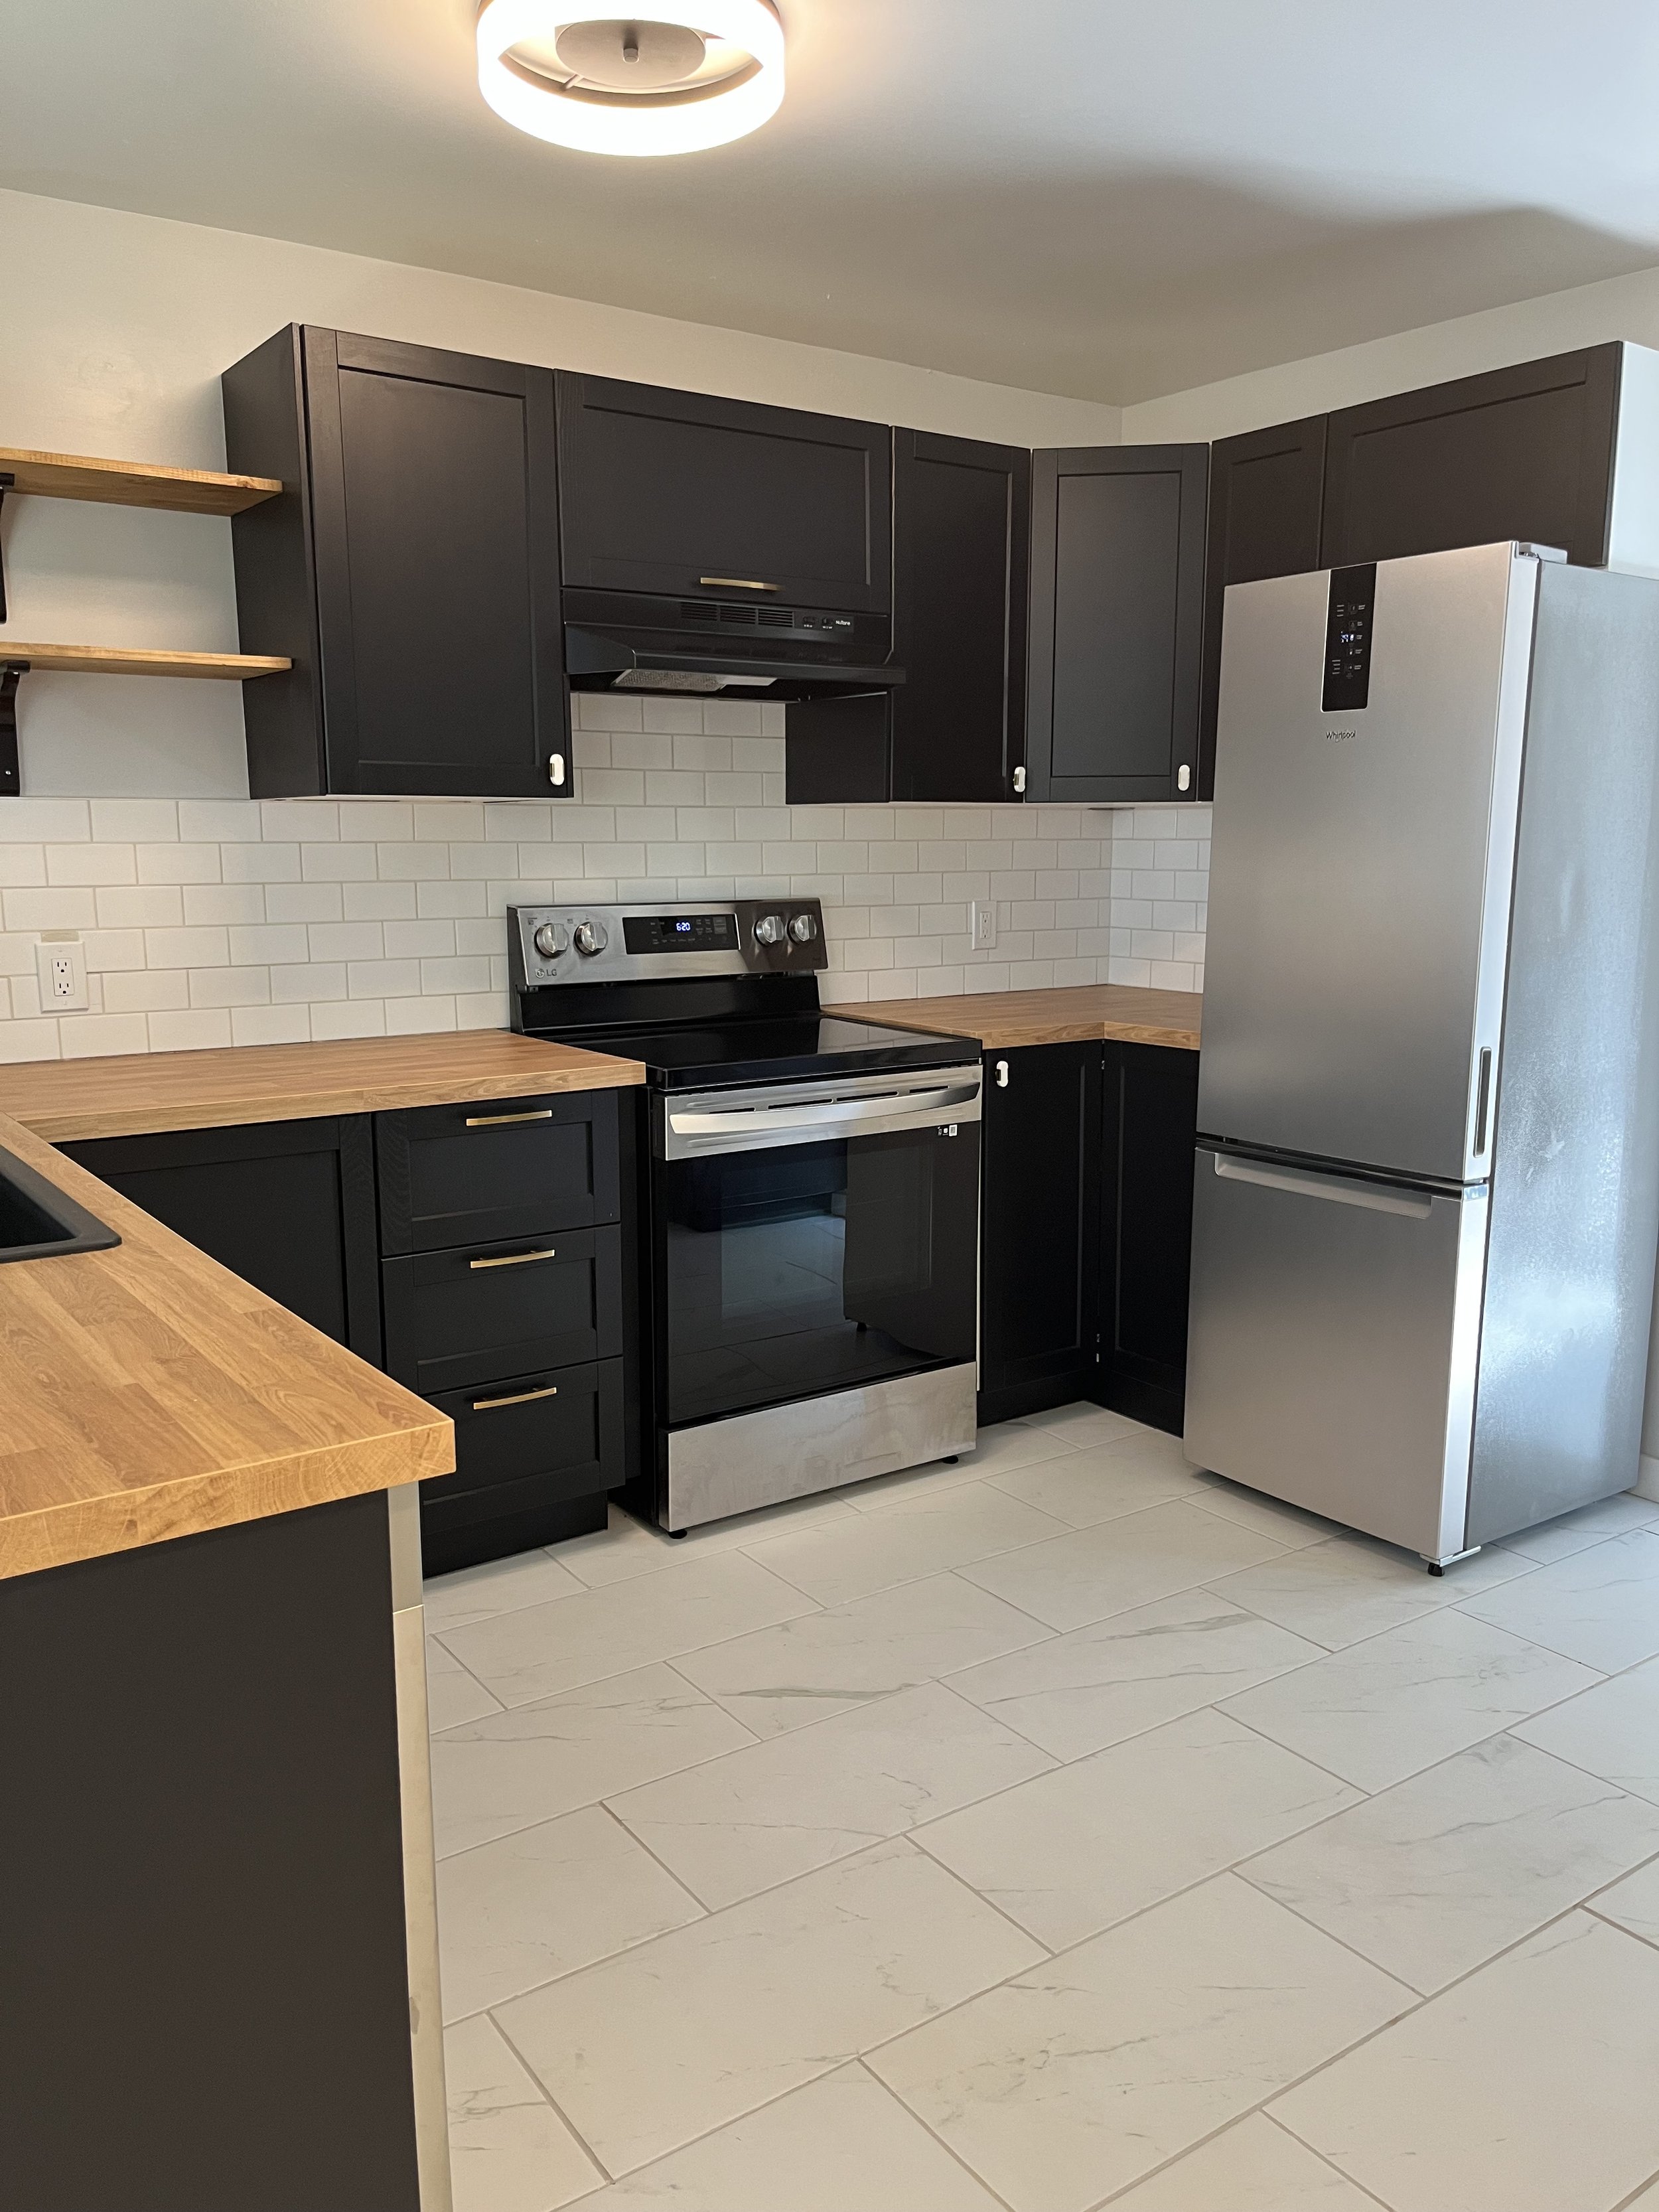
Replacing the cabinetry with new IKEA cabinets gave the space a total refresh and it was the most cost effective option because we did it ourselves! You don’t always have to splurge in order to make a big impact and putting in a little elbow grease goes a long way.
When you can, choose the cheaper option.
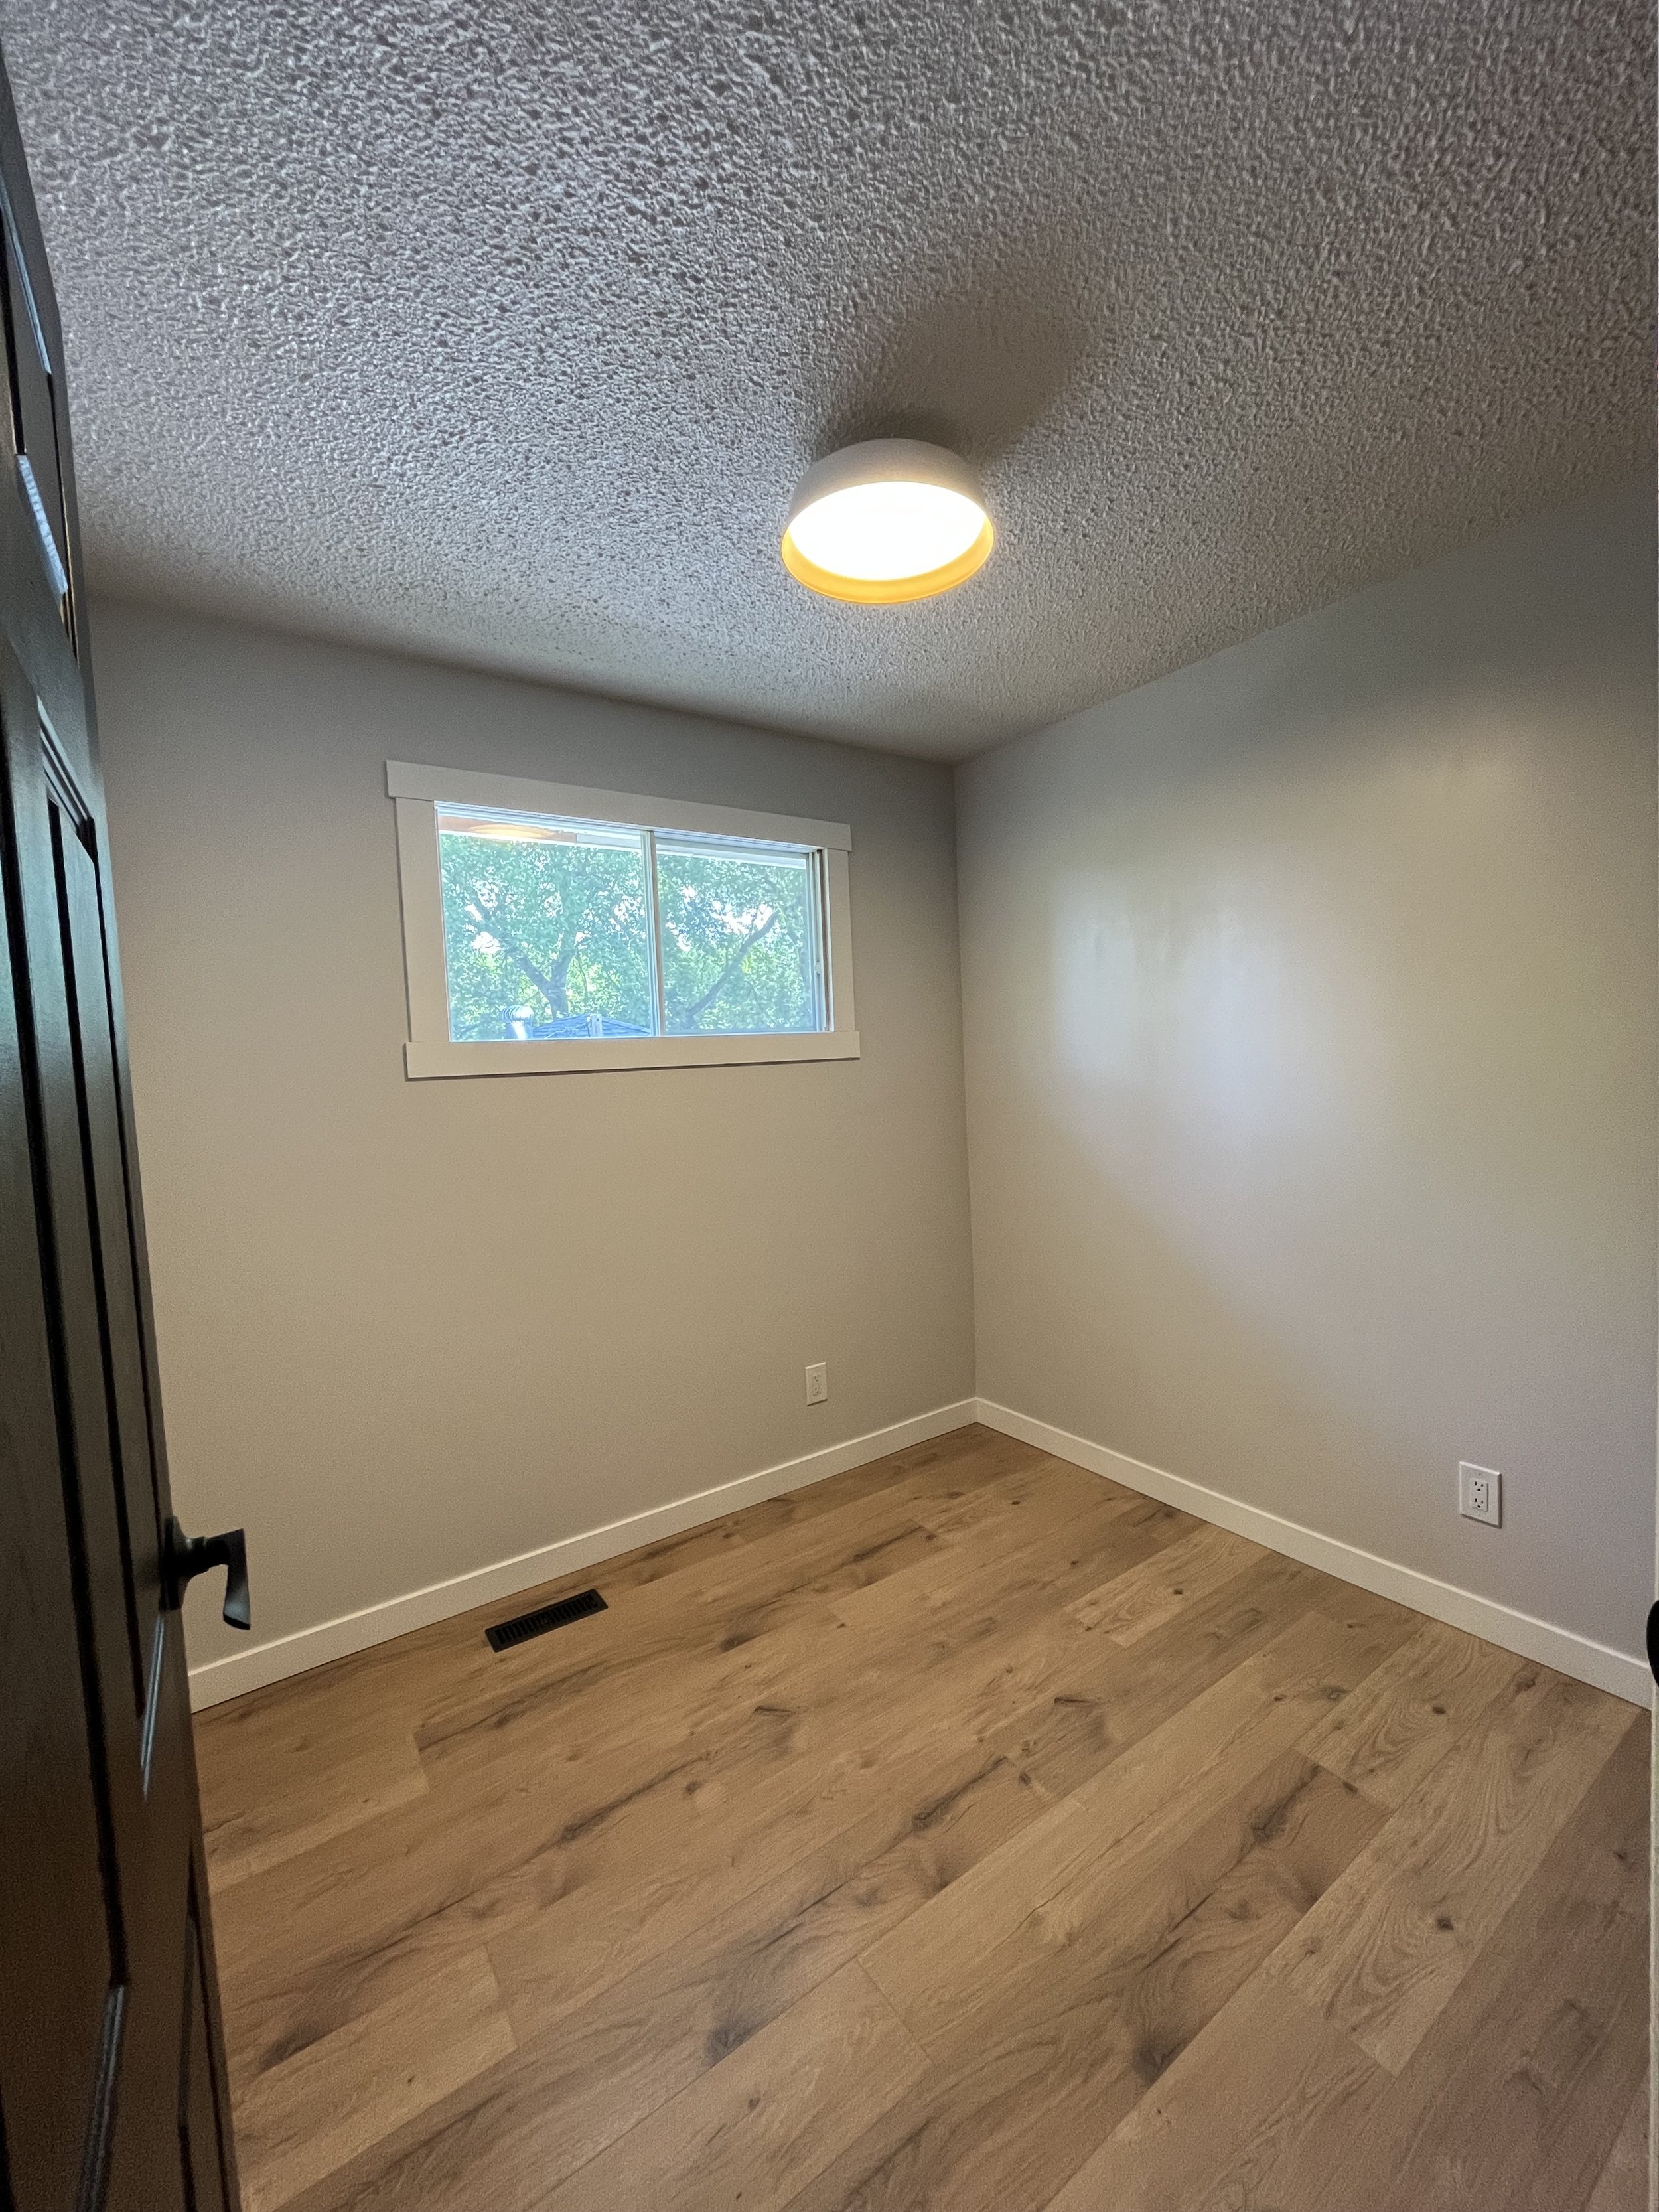
When designing this property I tried really hard to keep the cost low. We all know that stuff happens sometimes, so do yourself a favour and choose materials that won’t cost a fortune if they need to be replaced. Initially I wanted to put carpet on the second floor and in the basement but after some more thought I realized that it probably made more sense to put in some sort of plank flooring that would be easier to clean and cost less per square foot. Another decision I made in order to keep the cost down was to paint the shower surround in the main bathroom. I had really wanted to take out the dated tile and put in something newer, but at the end of the day the tile was in pretty good shape so I did my research and found a different solution. What I found instead was a tub and tile refinishing kit by Rustoleum that was a fraction of the cost of new tile and saved us a crazy amount of time in work! The tile now has a much brighter and clean look without breaking the bank! There are times when it makes more sense to splurge but I always try to find the most cost effective option wherever possible!
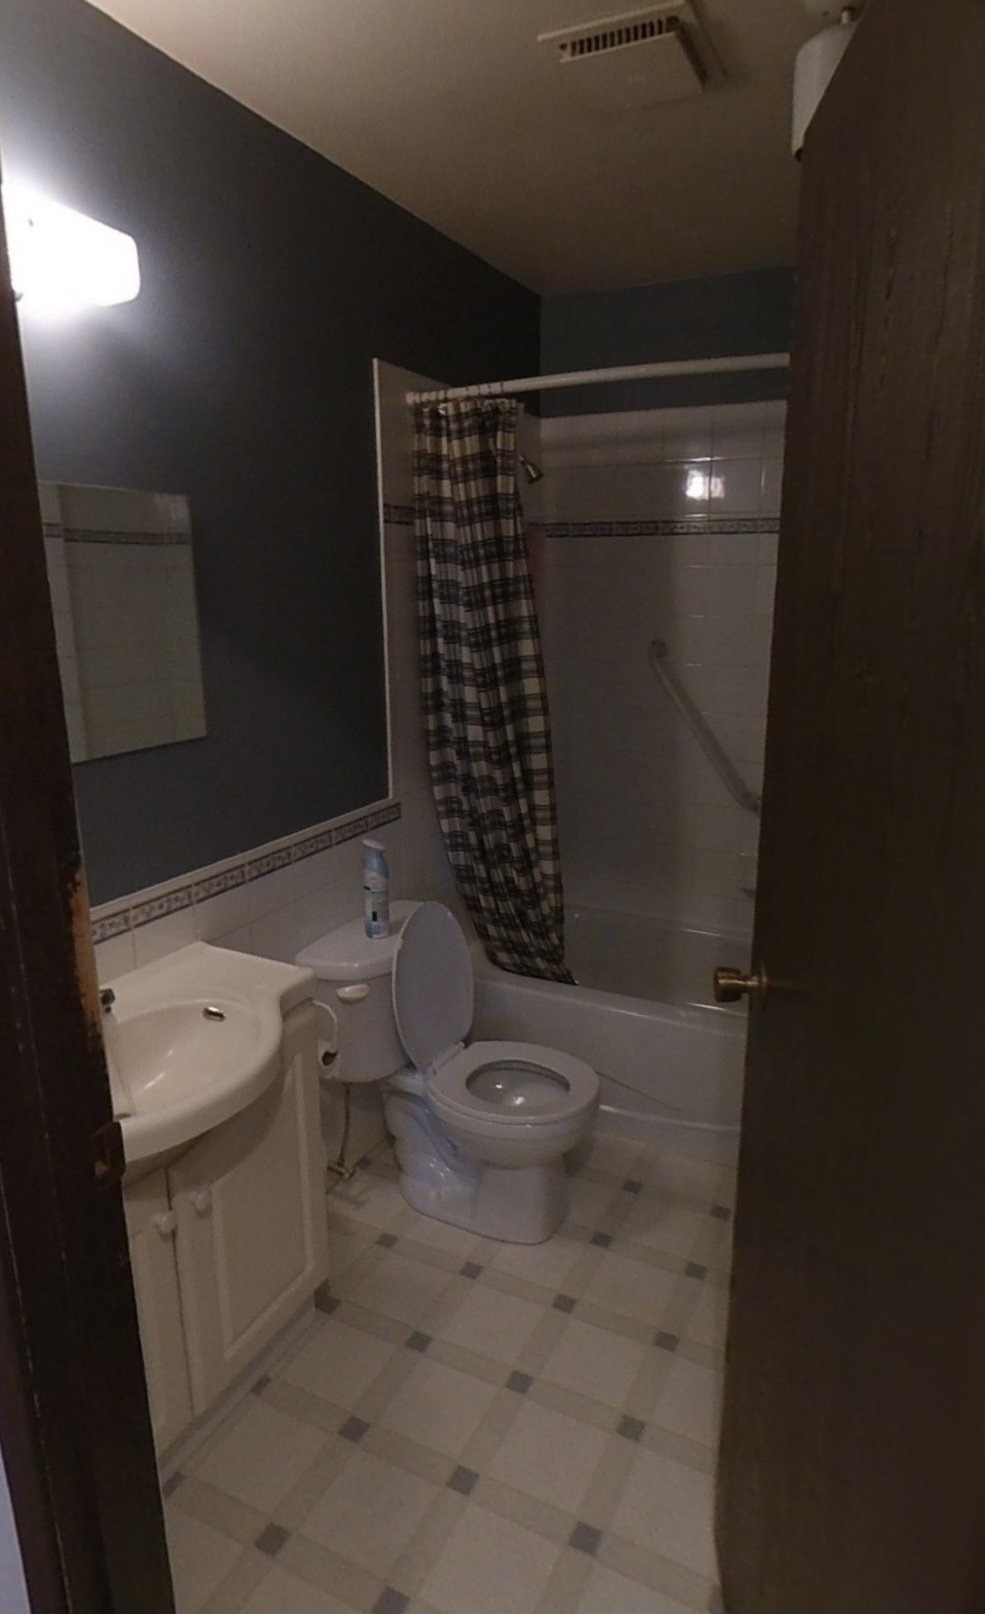

With the fresh white on the tiles now and a little paint on the walls this bathroom went from dark and dated to bright and beautiful! It hardly looks like the same room!
At the end of the day getting started in investment properties is very doable but there will be a lot of on the job learning. Remember to be kind to yourself (and your spouse if you’re working with them 😉), it will be frustrating at times but in the end it’s worth it!